


Accounts and Passwords
Traducciones al EspañolEstamos traduciendo nuestros guías y tutoriales al Español. Es posible que usted esté viendo una traducción generada automáticamente. Estamos trabajando con traductores profesionales para verificar las traducciones de nuestro sitio web. Este proyecto es un trabajo en curso.


Maintaining your user Linode Cloud Manager accounts, passwords, and contact information is just as important as administering your Linode. This guide shows you how to control access to the Cloud Manager, update your contact information, and modify account passwords. Note that the information in this guide applies to the Cloud Manager only, except for the section on resetting the root password.
Users and Permissions
You can grant other people access to your Linode Cloud Manager account by creating users and assigning permissions to restrict access to certain areas of the control panel. Adding users and configuring permissions is useful for groups that need to grant all team members access to the Linode Cloud Manager, or organizations that just want their billing department to have a separate account to receive invoices and billing information.
NoteA single user was automatically created for your account when you signed up for Linode. If you are the only person accessing the Linode Cloud Manager, you do not need to create any other users on your account.
Adding a User
When you add a user, you give that individual permission to log in to the Linode Cloud Manager and, depending on the access level they are assigned, receive email notifications. Users can have either limited or full access to account features.
Here’s how to add a user to your Linode account:
Log in to the Cloud Manager.
Click the Account link in the sidebar.
Click the Users & Grants tab.
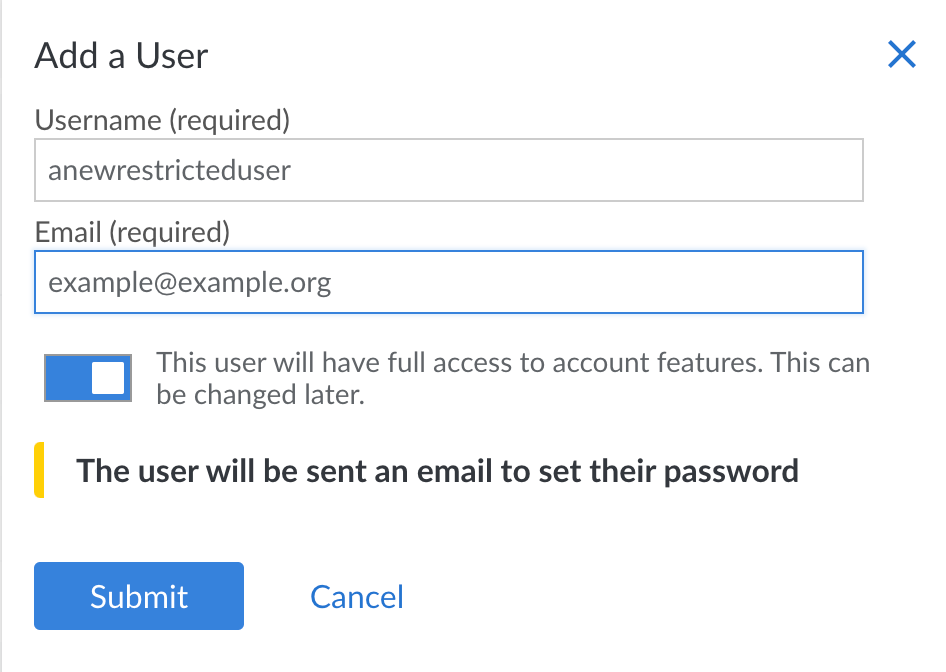
Click on Add a User. The Add a User menu appears.


Enter a username for the user in the Username field.
Enter the user’s email address in the Email field. A password creation link is sent to the new user’s email address.
Toggle the Account Access button to give the user full or limited access to account features.
Click Submit.
If you granted the user full access, the account is created and no further action is required. If you granted the user limited access, continue with setting user permissions.
Setting User Permissions
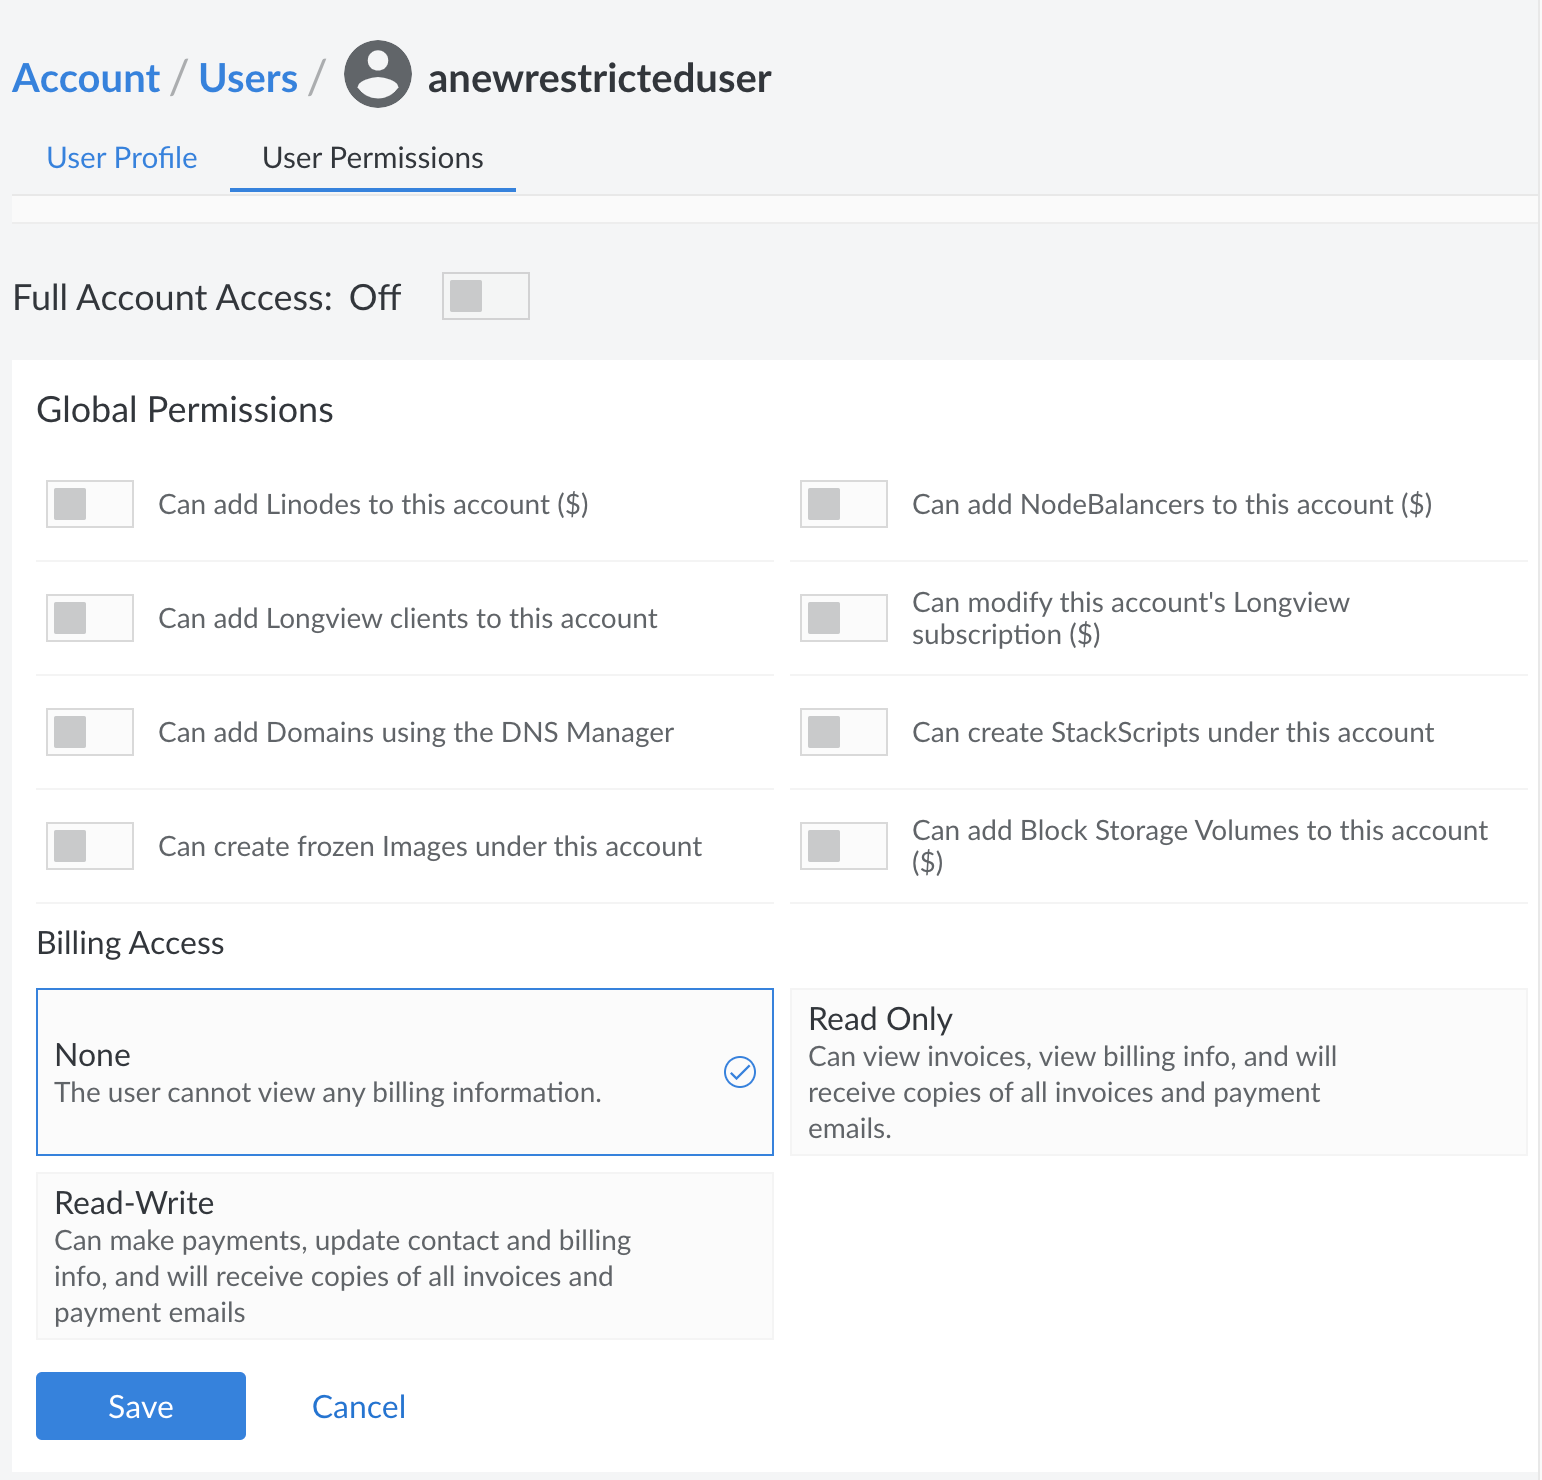
Setting permissions restricts a user’s access to certain areas of the Linode Cloud Manager. For example, you could limit a user to a single Linode and prevent them from removing the Linode or adding extra services. Don’t worry–these settings aren’t permanent. You can add or remove access for a user at any time in the future. User Permissions are divided into three categories. Global Permissions, Billing Access, and Specific Permissions.
Here’s how to set a user’s access permissions:
Click the Account link in the sidebar.
Click the Users & Grants tab.
Click the User Permissions link for the desired user.
Toggle the Full Account Access button off to limit the user’s account access and show permission categories.


Toggle the boxes in the Global Permissions section to allow the user to add Linodes, NodeBalancers, Domains, Longview clients, Block Storage Volumes to the account, create StackScripts, frozen Images, access all billing information, and cancel the entire account. These permissions are exactly as described and will not add any additional permissions.
Note
Granting access to settings denoted with a dollar sign ($) allows the user to perform actions that incur billing costs, such as adding or resizing a Linode.Select an option for Billing Access permissions. These options are as follows:
- None: The user is unable to view any billing information. This does not prevent a user from creating billable resources, which are instead applied as Global Permissions in the previous step.
- Read Only: The user can View Billing Info, receive copies of all invoices, and receive emails related to payments.
- Read-Write: The user has full access to Billing Information, can make payments, edit billing information, view billing information, receive copies of all invoices, and receive email related to payments.
Select the appropriate permissions (None, Read Only, or Read-Write) in the Specific Permissions section to allow the user to access individual Linodes, StackSripts, Block Storage Volumes, Images, NodeBalancers, and Domains. Unlike Global Permissions, Specific Permissions can apply to individual resources and not the service as a whole. Specific Permission options are as follows:
- None: The user can not view or otherwise interact with the selected resource.
- Read Only: The user can view the resource and all of its associated information typically visible within the Linode Manager, however they can not otherwise interact with it through Cloud Manager.
- Read-Write: The user has full access to the selected resource, and can make any changes that only an administrator is otherwise able to. This includes resource deletion, cloning, and all other applicable edits.
When you have finished configuring the user’s permissions, click Save. The user’s permissions are saved and effective immediately.
Recovering a Lost Username
Did you forget your Cloud Manager username? Recover it with the Forgot Username webpage. Here’s how:
- Visit the Forgot Username webpage.
- Enter your email address in the Email field.
- Click Submit.
In a couple minutes, you’ll receive an email message with any Linode Cloud Manager users that correspond to that email. If you do not receive information about any users, then you may have registered your account with a different email.
Removing a User
You can permanently remove a user account from the Linode Cloud Manager. Here’s how:
- Click the Account link in the sidebar.
- Click the Users tab.
- Click the Delete link for the desired user. A warning appears asking you to confirm that you want to delete the user.
- Click Delete in the warning to confirm deletion.
The user is removed and is no longer able to access the Linode Cloud Manager.
Changing a Username
You can update a username, including your own, from the Linode Cloud Manager.
Click the Account link in the sidebar.
Click the Users & Grants tab.
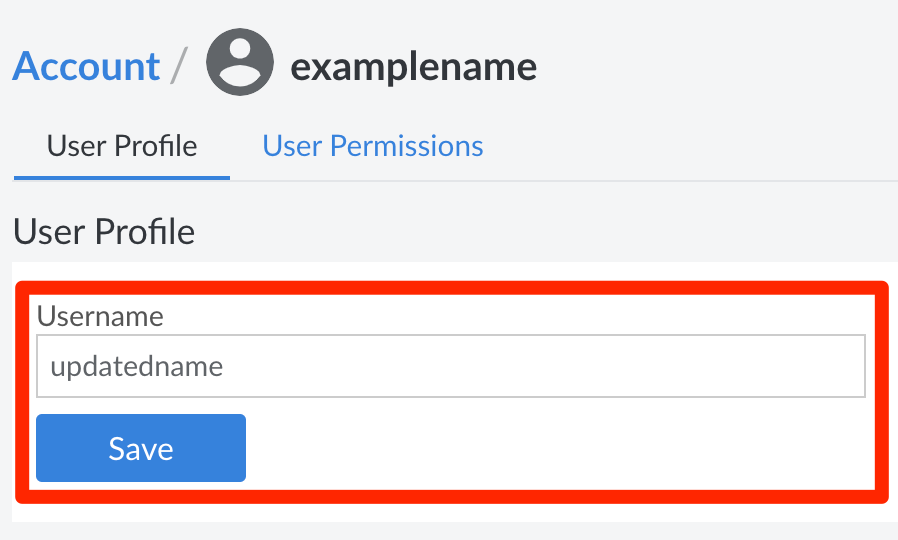
Locate the user in the list and click on their User Profile link.
Enter a new username in the Username field.


Click Save.
Email Addresses and Contact Information
Linode uses the contact information on file in your account to notify and bill you. Keep this information current to prevent service interruptions. It’s especially important to keep your email address current.
The Billing Info and User & Grants pages have email address fields. The email addresses saved on these pages receive different notifications, as described in the following sections. If you are the only user, you should enter your email address on both pages. If there are multiple users, verify that the primary account holder’s email address is current on the Billing Info page.
Updating Billing Contact Information
Use the Billing Info page to update the contact information for the Linode account. The email address saved on this webpage receives invoices, receipts, and credit card expiration warnings.
NoteLinode Support tickets are not sent to your Billing Contact email address, but to the email address for the relevant user.
Here’s how to update the contact information and the email address on the Account page:
Click the Account link in the sidebar.
Under the Billing Contact section, click Edit to show the Edit Billing Contact Info menu.


Update the contact information and the email address for the account.
Click Save.
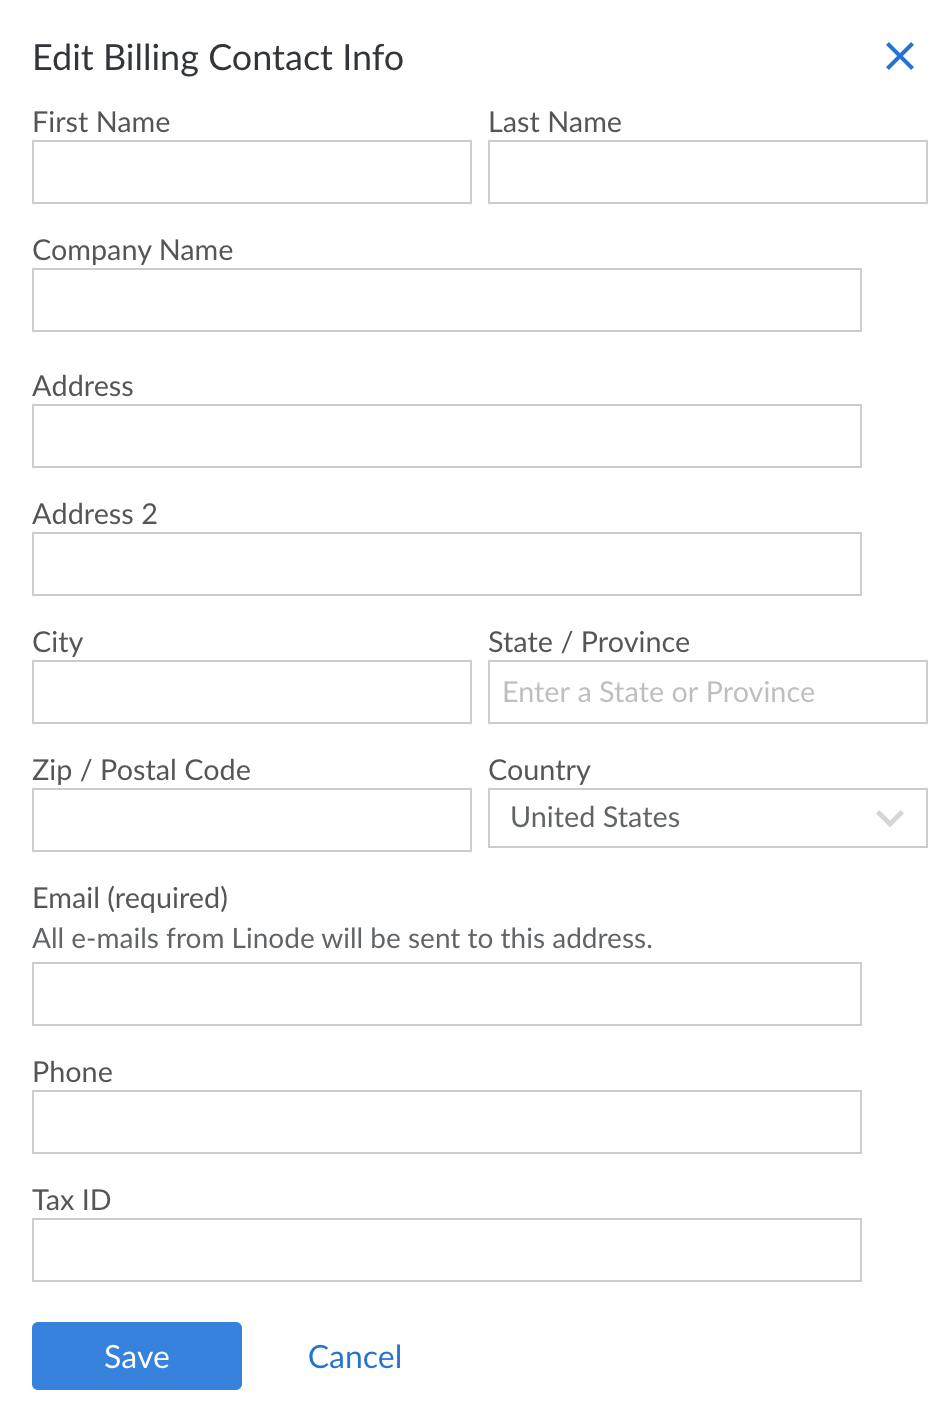
The account’s billing contact information is now updated.
Changing Your User Email Address
Use the Users & Grants page to modify the email address associated with a user account. The email addresses listed on this page receive IP whitelist warnings, password reset messages, and support tickets for services that their associated users have permission to access. Users with limited account access can also receive invoices and receipts if granted access to that information.
NoteOnly full account access users can receive threshold notification emails.
Here’s how to change a user’s email from the Users & Grants page:
Click the Account link in the sidebar.
Click the Users & Grants tab.
Click the User Profile link for the desired user.
Enter the updated email address in the Email field.


Click Save.
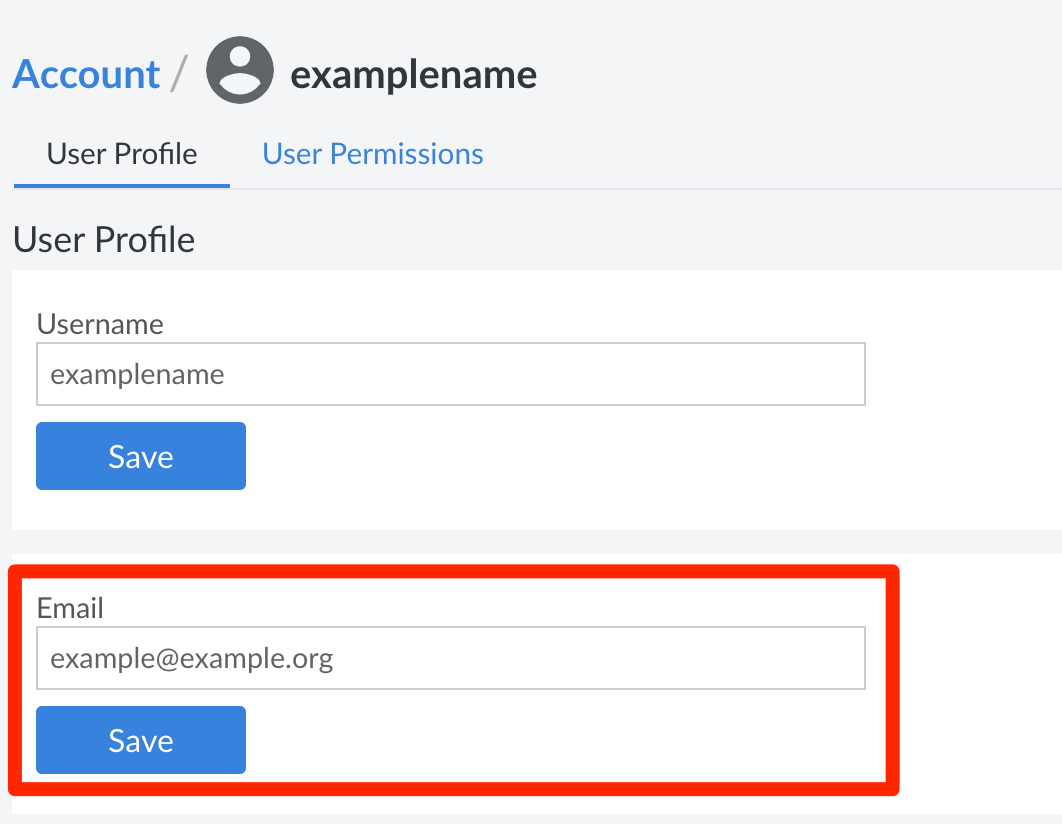
The user’s email address is now updated.
NoteIf you do not have full account access, you can view your user profile settings and update your email address by clicking on your username at the top of the Cloud Manager screen and selecting Display.
Passwords
Creating strong passwords is essential to protecting your Linode and your Linode Cloud Manager account. If you suspect that an unauthorized user has gained access to one of your accounts, you should change the password immediately. Use the instructions in this section to change your Linode Cloud Manager password and reset the password for the root user on the Linode.
Changing or Resetting Your Linode Cloud Manager Password
If you want to change your password, or you forgot your password and need a new one, you can accomplish these tasks through the Forgot Password webpage. Here’s how:
Visit the Forgot Password webpage.
Enter your username in the Username field.
Note
If you’ve forgotten your Linode Cloud Manager username, see Recovering a Lost Username.Click the Reset password button.
Check your email for a message containing further instructions.
Follow the instructions in the email message to reset your password.
Resetting the Root Password
If you can’t remember the password for the root user on a Linode, use the Linode Cloud Manager to reset it. Here’s how:
- Click the Linodes link in the sidebar.
- Select a Linode by clicking its label. The Linode’s details page appears.
- Click Power Off at the top of the details page to turn off your Linode if it is powered on. Ensure the Linode displays its status as “OFFLINE” before proceeding.
- Click the Settings tab underneath the detail page Summary.
- Under the Reset Root Password panel, select your primary disk from the Disk menu.
- Enter a new password for the
rootuser in the Password field. - Click Save. The Linode’s dashboard appears.
- Click Power On to turn on your Linode.
Now you can use the new root user password to log in to your Linode. See
Connecting to Your Linode via SSH for more information about connecting. If you are unable to connect with the root credentials via SSH, try connecting with
Lish instead. If you are able to connect via Lish but not SSH, you may need to troubleshoot your SSH configuration and firewall rules.
Next Steps
You can take additional steps to secure your Linode Cloud Manager account by enabling the two-factor authentication and IP address whitelisting features. You can also configure security event notifications and disable API access. For instructions, see the Security guide.
This page was originally published on