


How to Clear Cache and Cookies in a Browser
Traducciones al EspañolEstamos traduciendo nuestros guías y tutoriales al Español. Es posible que usted esté viendo una traducción generada automáticamente. Estamos trabajando con traductores profesionales para verificar las traducciones de nuestro sitio web. Este proyecto es un trabajo en curso.
A browser’s cache improves website loading performance by reducing the data processing and fetching. When a sizeable amount of cached content is stored, it slows down the system and reduces the performance of the application.
When you clear the cache the performance of the system and application is enhanced.
Clear the Cache in Chrome
Keyboard Shortcut
On Windows or Linux
While in the browser press Ctrl + Shift + Delete keys.
On MacOS
While in the browser press Command + Shift + Delete keys.
In the Browser
Click the Chrome menu and select Clear Browsing Data….
In the Clear browsing data window, click the Advanced tab.

Select the following:

Browsing history
Download history
Cookies and other site data
Cached images and files
In the Time range drop-down menu, choose the period of time for which you want to clear cached information. To clear your entire cache, select All time.
- Click the Clear data button.
- Close all windows in the browser and re-open the browser.
Disable Cache with Developer Tools
Chrome has a Developer tools dashboard built in. Within this you have the ability to disable caching in a specific tab.
To open the Web Developer tools panel, click on the View menu, then click Developer, and Developer Tools.
The dashboard will open at the bottom of the screen.
Click the Network tab, and select the Disable Cache checkbox.


Reload the page. This will load the page with the cache disabled.

Incognito Browsing in Chrome
Chrome allows you to browse in Incognito Mode.
- This is a private browser window which allows you to surf the web without the browser saving your cookies or site history.
- However, it does not mean that your browsing is private to your network, ISP, or search engines.
- You must exit the browser window to clear the history, cookies, and data created during the session.
To create an Incognito window, click the File menu and select New Incognito Window.
- You can also open an Incognito window with the keyboard shortcut Ctrl + Shift + N (Windows and Linux) or Command + Shift + N (MacOS).
Clear the Cache in FireFox
Keyboard Shortcut
On Windows or Linux
While in the browser press Ctrl + Shift + Delete keys.
On MacOS
While in the browser press Command + Shift + Delete keys.
In the Browser
- Click the History menu and select Clear Recent History….

- In the Time range to clear drop-down menu, select the desired range; to clear your entire cache, select Everything.
- In the History section, select the elements of the history to clear; to clear your entire cache, select all items.
- Click Clear Now.
- Close all windows in the browser and re-open the browser.

Disable Cache with Web Developer Tools
Firefox has a Web Developer tools dashboard built in. Within this you have the ability to disable caching in a specific tab.
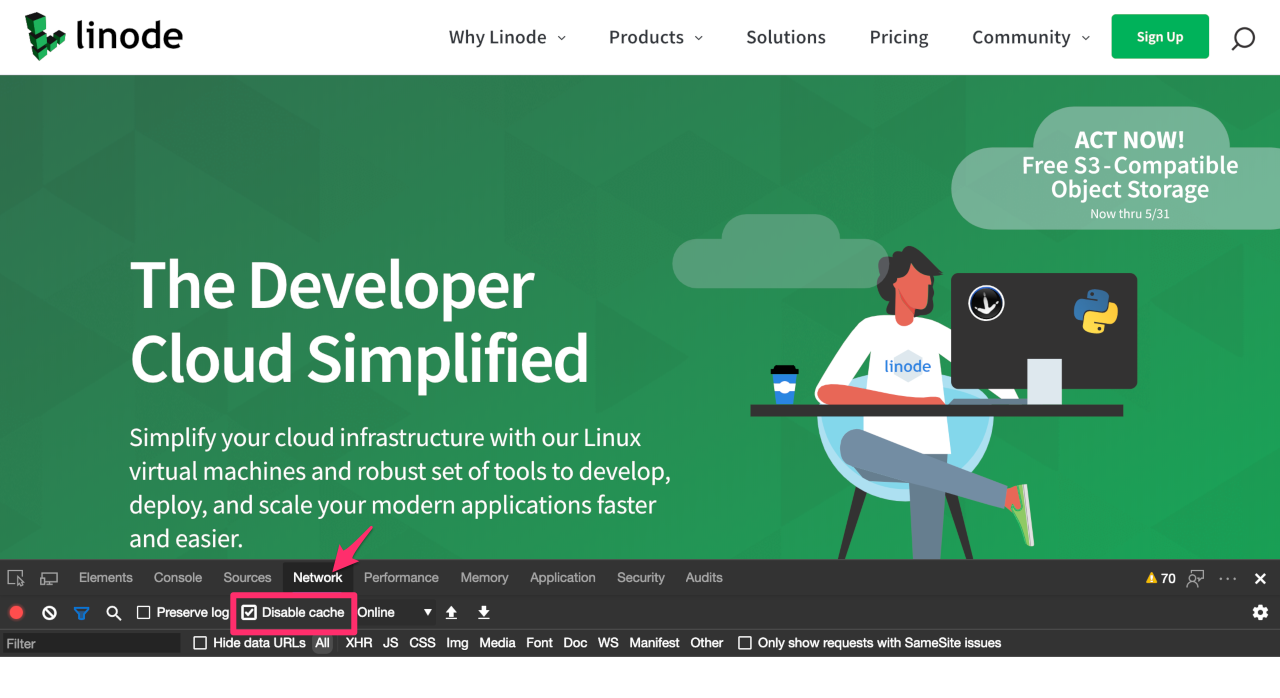
To open the Web Developer tools panel, click on the Tools menu, then click Web Developer, and Toggle Tools.
The dashboard will open at the bottom of the screen.
Click the Network tab, and select the Disable Cache checkbox.


Reload the page. This will load the page with the cache disabled.

Private Browsing in Firefox
A private browser window can be opened in Firefox.
- Private browsing allows you to surf the web without saving cookies or browsing history or from using any previously cached data.
- It does not mean you can mask your identity on the web or your activity online.
- Data is cleared upon exiting the browser window.
To open a private browsing session, click the File menu and select New Private Window.
- You can also open a private window with the keyboard shortcut Ctrl + Shift + P (Windows and Linux) or Command + Shift + P (MacOS).
Clear the Cache in Safari
From the Safari menu, select Clear History.

Select the desired time range option in the Clear drop-down menu.
To clear all the cache select all history, and then click Clear History.
Go to the Safari menu and click Quit Safari to exit the browser.
On MacOS, press Command + Q to exit the browser completely.

Disable Cache with Developer Tools
Safari has a Developer tools dashboard built in, but you may need to enable it. Within this you have the ability to disable caching in a specific tab.
First, to enable it, click the Safari menu, Preferences. Then in the Advanced tab, choose Show Develop menu in menu bar.

Close the preference panel. The Develop menu should now appear on the menu bar.
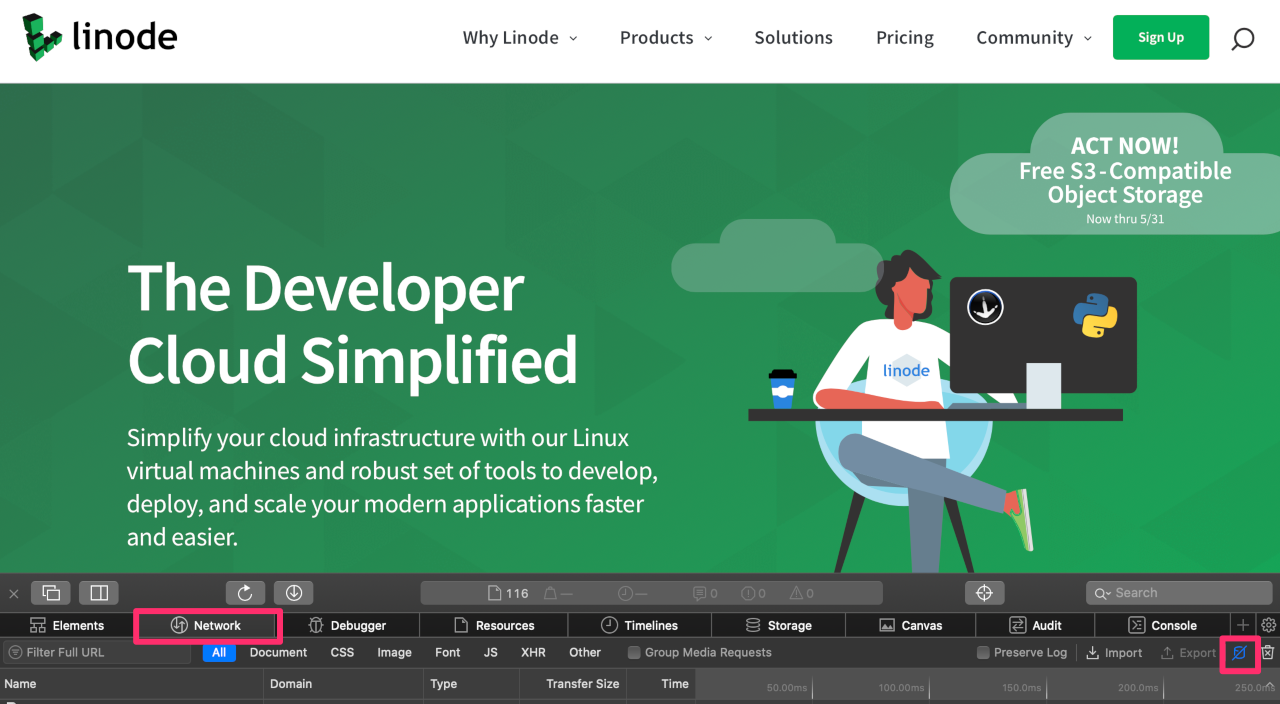
To open the Developer tools panel, click on the Develop menu, then click Show Web Inspector.
The dashboard will open at the bottom of the screen.
Click the Network tab, and select the icon for Ignore the resource cache when loading resources.


Reload the page. This will load the page with the cache disabled.

Private Browsing in Safari
A private browser window can be opened in Safari.
- Private browsing allows you to surf the web without saving cookies or browsing history.
- It does not mean you can mask your identity on the web or your activity online.
- Additionally, tabs in a private browser window are isolated from each other and private browsing windows can not be passed to other Apple devices via Handoff.
- Data is cleared upon exiting the browser window.
To open a private browsing session, click the File menu and select New Private Window.
- You can also open a private window with the keyboard shortcut Ctrl + Shift + N (Windows and Linux) or Command + Shift + N (MacOS).
Clear the Cache in Edge
Keyboard Shortcut
On Windows or Linux
While in the browser press Ctrl + Shift + Delete keys.
On MacOS
While in the browser press Command + Shift + Delete keys.
In the Browser
Click the History menu and select Settings.
In the Clear browsing data section click Choose What to Clear.

Select the following:

Browsing history
Download history
Cookies and other site data
Cached images and files
In the Time range drop-down menu, choose the period of time for which you want to clear cached information. To clear your entire cache, select All Time.
- Click the Clear Now button.
- Close all windows in the browser and re-open the browser.
Disable Cache with Developer Tools
Edge has a Developer tools dashboard built in. Within this you have the ability to disable caching in a specific tab.
To open the Developer tools panel, click on the Tools menu, then click Developer, and Developer Tools.
The dashboard will open at the side or bottom of the screen. You can change the location of this panel to your preference.
Click the Network tab, and select the Disable cache checkbox.


Reload the page. This will load the page with the cache disabled.
InPrivate Browsing in Edge
Edge allows you to browse in InPrivate Mode.
- This is a private browser window which allows you to surf the web without the browser saving your cookies or site history.
- However, it does not mean that your browsing is private to your network, ISP, or search engines.
- You must exit the browser window to clear the history, cookies, and data created during the session.
To create an new InPrivate window, click the File menu and select New InPrivate Window.
- You can also open an InPrivate window with the keyboard shortcut Ctrl + Shift + N (Windows and Linux) or Command + Shift + N (MacOS).
This page was originally published on